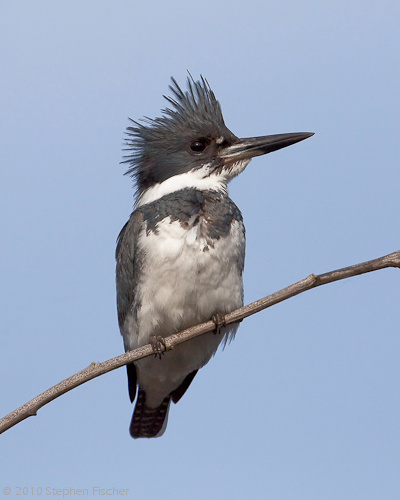
Build your own wildlife blind
 For photographing some wildlife,
it can be challenge to get close enough to get a good image. Many species are
shy around humans (and for good reason) and keep considerable distance if they
are aware of your presence. Even with a big lens, it may not be good
enough without some additional means to stay hidden from view and still be able
to use your camera. One popular means used by some hunters is through the use
of a wildlife blind. They are readily available for purchase going for at
least $100 (see the following
link as an example). Or you can build your
own for even less money and customize it to better suite your needs as will be
discussed here.
For photographing some wildlife,
it can be challenge to get close enough to get a good image. Many species are
shy around humans (and for good reason) and keep considerable distance if they
are aware of your presence. Even with a big lens, it may not be good
enough without some additional means to stay hidden from view and still be able
to use your camera. One popular means used by some hunters is through the use
of a wildlife blind. They are readily available for purchase going for at
least $100 (see the following
link as an example). Or you can build your
own for even less money and customize it to better suite your needs as will be
discussed here.
I wanted a blind that would give me some flexibility as to which side to
photograph out of without being constrained to a particular view based on the
direction it was setup. To address this, I decided on a design with 3
sides and a window flap on each. It also needed to be big enough that one could
setup a big lens (i.e. 500mm) on a tripod with a gimbal head in the middle
pointed out one window, while sitting on a small stool. From there it would be
also possible to peer through one of the other two windows with a separate
camera and lens in case you had a wildlife opportunity from a different
direction. This blind also needs to be portable enough that it could
be broken down and carried into the field by yourself along with the rest of
your camera gear.
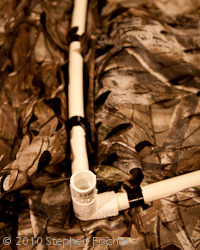 To build this I settled on making a frame out of 1/2" schedule 40 PVC pipe used
for sprinkler systems. Each side for the triangular roof has a pipe length
of 42", with separate vertical pipes to hold this above the ground that are 54"
in length. It only needs to be high enough that you can sit on a stool
without hitting your head on the roof. Each of the 3 corners are then joined
with a 3-way 90 degree coupling. To allow for portability, only the roof
segment is glued together. The 3 54" pieces are simply inserted as a
friction fit when setting it up in the field. This implies your transportation
needs to be big enough to hold the triangular roof frame that is 44" x 40" in
size, plus the separate 54" legs. Resist the temptation of making the
blind large, as it will just be harder to transport, and may end being too
conspicuous with the wildlife.
To build this I settled on making a frame out of 1/2" schedule 40 PVC pipe used
for sprinkler systems. Each side for the triangular roof has a pipe length
of 42", with separate vertical pipes to hold this above the ground that are 54"
in length. It only needs to be high enough that you can sit on a stool
without hitting your head on the roof. Each of the 3 corners are then joined
with a 3-way 90 degree coupling. To allow for portability, only the roof
segment is glued together. The 3 54" pieces are simply inserted as a
friction fit when setting it up in the field. This implies your transportation
needs to be big enough to hold the triangular roof frame that is 44" x 40" in
size, plus the separate 54" legs. Resist the temptation of making the
blind large, as it will just be harder to transport, and may end being too
conspicuous with the wildlife.
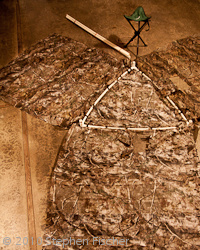
Once the frame is completed, you then need to get yourself some camoflage
material. This can be found at larger outdoor sporting good stores that
cater towards hunters. You will need enough material for the roof,
allowing some extra slop to wrap around the frame, plus material for each of the
3 walls. You should also allow even more slop in the length of the walls,
as this can come in handy to help secure the bottom of blind to ground in case
you have a breeze or the terrain it will be on is uneven. Look for some camo material with a minimum width of 48" and 24' in
length. You can find something that is puncuated with holes and flaps, and
is easy to cut to shape with scissors. First cut the top piece to size,
leaving about 3 inches on each of the 3 sides to wrap around the frame to the
other side. You can then attach the material for each of the 3 sides by
simply using a stapler or with black electrical tape. The holes that are distributed in the camoflage
material should make it possible to position the stapler through it for making
the necessary staples all the way around each of the 3 segments. Next in a
likewise manner attach the 3 walls at the top with the roof, but leaving the
sides free to just hang down like curtains.
 Lastly
you will need to cut three opening flaps about 9" square to provide enough space
for a large lens with its hood to portrude through with a little extra slop.
You want to only cut each opening on 3 edges, leaving the top intact. In
this way, if you are not peering through a specific window, it will flap down to
better obscure you from the wildlife on the outside. These windows should
be in the middle of each window closer to the top. To decide on the exact height
you may want figure out what you are going to use as stool while out in the
field. A 5 gallon bucket could work, or you can also pick up a small folding 3
legged stool from the same sporting good hunting supply shop. Then setup
your tripod and lens the way you would use it in the field while sitting on the
stool, and measure the height of the lens hood while it is pointed in a level
direction to determine the height in which to make the cut for the 3 windows.
Lastly
you will need to cut three opening flaps about 9" square to provide enough space
for a large lens with its hood to portrude through with a little extra slop.
You want to only cut each opening on 3 edges, leaving the top intact. In
this way, if you are not peering through a specific window, it will flap down to
better obscure you from the wildlife on the outside. These windows should
be in the middle of each window closer to the top. To decide on the exact height
you may want figure out what you are going to use as stool while out in the
field. A 5 gallon bucket could work, or you can also pick up a small folding 3
legged stool from the same sporting good hunting supply shop. Then setup
your tripod and lens the way you would use it in the field while sitting on the
stool, and measure the height of the lens hood while it is pointed in a level
direction to determine the height in which to make the cut for the 3 windows.
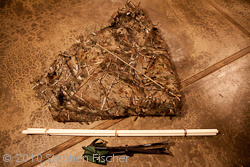
 Once
you are done with the construction, you will want to pack it up for
transportation. The easiest way is just to wrap the side curtains around
the roof frame, and then connect a long bungee cord around the frame to keep the
curtains wrapped without coming loose and dragging on the ground. You will
also want a small set of bungee cords or rubber bands to hold the 3 legs
together so you can carry them in the same hand as the blind (That way you will
have the other hand free to lug your camera gear over your shoulder). To
close the side curtains together once situated inside the blind, having some
binder clips can do the trick. If you have some uneven terrain, the blind
can be a little unstable given the flimsiness of the PVC pipes holding it up.
You can add some more stability by placing a few rocks on the side of one more
curtains to help with the stability and prevent any flapping in the wind.
You may also need to place a rock or two under one of the legs to help level it.
A better longer term solution would be to attach some cord to each corner of the
roof and additionally stake that off to the ground like you would a tent.
Once
you are done with the construction, you will want to pack it up for
transportation. The easiest way is just to wrap the side curtains around
the roof frame, and then connect a long bungee cord around the frame to keep the
curtains wrapped without coming loose and dragging on the ground. You will
also want a small set of bungee cords or rubber bands to hold the 3 legs
together so you can carry them in the same hand as the blind (That way you will
have the other hand free to lug your camera gear over your shoulder). To
close the side curtains together once situated inside the blind, having some
binder clips can do the trick. If you have some uneven terrain, the blind
can be a little unstable given the flimsiness of the PVC pipes holding it up.
You can add some more stability by placing a few rocks on the side of one more
curtains to help with the stability and prevent any flapping in the wind.
You may also need to place a rock or two under one of the legs to help level it.
A better longer term solution would be to attach some cord to each corner of the
roof and additionally stake that off to the ground like you would a tent.
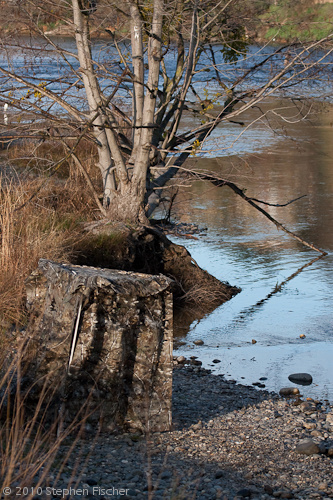
 One
last word of advice in the use of the blind: It is best to get out and set
it up and be ready to shoot ahead of the morning light. In this way you can
hope that the wildlife of interest does not see you go into the blind and
just assumes instead that it is part of the scenery. Many species are
smarter than you think and will remember, if they have seen you go into it
previously. If it is possible, it helps to set it up a few days ahead
of time in the target area. This will help condition the wildlife to the
blinds presence and thus they may be less reluctant when seeing it in the
future.
One
last word of advice in the use of the blind: It is best to get out and set
it up and be ready to shoot ahead of the morning light. In this way you can
hope that the wildlife of interest does not see you go into the blind and
just assumes instead that it is part of the scenery. Many species are
smarter than you think and will remember, if they have seen you go into it
previously. If it is possible, it helps to set it up a few days ahead
of time in the target area. This will help condition the wildlife to the
blinds presence and thus they may be less reluctant when seeing it in the
future.